
1969 Dodge Coronet R/T
+2
viper006
528-Hemi
6 participants
Page 1 sur 1

 1969 Dodge Coronet R/T
par 528-Hemi Jeu 20 Avr - 1:13
In talking with a few members, I've been saying I've been slowly working on-and-off on a Silent build, and I have been VERY slowly I might add, but over a good amount of time too! SO, I told them, I didn't have enough to "post" on that build yet, but then recently, I got to looking, and YES, I DO have enough to post on one of the 2 "silent builds" I been playing with.... I had yet to post this build on ANY forum that I'm on. So with that said, Let em begin by saying this model came to me by a friend, on one of the forums that he & I am on, (and to add to that, He & I know each other in-person, as well from several other forums too! -Thanks man! (I hope he recognizes the car!)
So, you have the old Monogram 1/24th scale '69 Dodge "440 6-Pack" or also was called the '69 Dodge Super Bee. I'm NOT sure which one this was! Anyway, even so, no matter which one it was made to be out of the box, it came with a 440 6 pack, backed by a A833 4 Speed manual Transmission! WELL of all of these I'e seen built, I have yet to see any other engine used in it! (UNLESS, I missed something somewhere).... I haven't seen other-then the 440 in it!
SO those who know me, KNOWS whats about to happen! Or atleast should have a pretty good idea whats about to happen! Yep, you guessed it, I'm putting a HEMI in 'er!
So with that, this is how the model came to me:


Yeah, the ole girl needs some TLC.... And she'll get just that! I'm going to completely transform this car from a box-stock kit, to an show quality museum piece! A LOT of work is going to go into this model as it is in fact a Coronet, as those who know me, knows, I favor the Coronets to start with.... So, I'll be tossing A LOT at and in this kit as I go!
Also the body color has been picked out! The car will be Hemi Orange, V-2 Car, with Black R/T Deck Stripe, as well as a black vinyl top! 8D Will have a full black interior with some Hemi Orange highlights! (As well as a few other goodies inside for detail sake!)
Stay tuned! More to come, thanks for looking, comments always welcome! ENJOY!
So, you have the old Monogram 1/24th scale '69 Dodge "440 6-Pack" or also was called the '69 Dodge Super Bee. I'm NOT sure which one this was! Anyway, even so, no matter which one it was made to be out of the box, it came with a 440 6 pack, backed by a A833 4 Speed manual Transmission! WELL of all of these I'e seen built, I have yet to see any other engine used in it! (UNLESS, I missed something somewhere).... I haven't seen other-then the 440 in it!
SO those who know me, KNOWS whats about to happen! Or atleast should have a pretty good idea whats about to happen! Yep, you guessed it, I'm putting a HEMI in 'er!
So with that, this is how the model came to me:
Yeah, the ole girl needs some TLC.... And she'll get just that! I'm going to completely transform this car from a box-stock kit, to an show quality museum piece! A LOT of work is going to go into this model as it is in fact a Coronet, as those who know me, knows, I favor the Coronets to start with.... So, I'll be tossing A LOT at and in this kit as I go!
Also the body color has been picked out! The car will be Hemi Orange, V-2 Car, with Black R/T Deck Stripe, as well as a black vinyl top! 8D Will have a full black interior with some Hemi Orange highlights! (As well as a few other goodies inside for detail sake!)
Stay tuned! More to come, thanks for looking, comments always welcome! ENJOY!

528-Hemi- Professionnel

-
 Messages : 463
Date d'inscription : 21/08/2016
Age : 46
Localisation : New Hampshire, USA
Emploi/loisirs : Retired, Model Railroading, Model Cars, Model Trucks, REAL Cars & Trucks, Restoring OLD car & Truck parts unusable, repurposed.
Humeur : Good

Re: 1969 Dodge Coronet R/T
par 528-Hemi Jeu 20 Avr - 1:14
So to begin, I'm going to pull out some engine parts, as I mentioned, I plan to STUFF a 426 (or bigger) Hemi into it! SO that means, I have to dig through my parts organizers, to see what I have for 1/24th scale 426 Hemi's to start, I thought I had a new (or at least a couple new) 426 Hemi's from the Monogram/Revell '71 Hemi 'Cuda.. BUT, thats not the case! ALL I have are glue bomb 1/24th scale Hemi's, so thats what it'll have to be! So, with that, I am rebuilding a glue bomb car, which will be getting a glue bomb motor!!!! So fitting, for a build like this! Plus using up some old parts, and saving them! Which is a GREAT thing too!

So after digging a while to see what I had, comparing it, this is the best choice for this build as A LOT is going to happen to this engine, at this point, anything is possible! Remember, this car, isn't going to be "Stock", just over that, so Street Machine? I'm not sure what to call this one, BUT its definitely NOT "stock", or going to be anyway!
The engine I pulled out, isn't in the best of shape, It was pre-painted Testors Orange, the standard color Orange, The Transmission, needs SERIOUS help! The timing chain cover, and water pump were nothing more then a glob of glue smudges, and literally melted to the block! I had to mill off the entire thing to make the block flat again! I then while at it, and using the mill I decked the block, making the area where the heads sat, flat again (they were glued on and were not flush sitting on the engine, as well the intake was in bad shape too!) I milled the intake off AFTER removing the heads! I had fortunately saved the heads for being destroyed, but had to destroy the intake, as it wasn't even worth keeping with all the glue that bubbled up when whoever applied it to the engine! What a mess, but in my last pic, looks A LOT better, I did the mill work and then needed stripped which it went for a swim in the Purple Pond.

All that listed in the above picture.

Then, the BANE of my existence... that damned oil pan! The glue joints of even this part of a NEW engine by me, SUCK, they never seem to fit right on this model. The seams I don't believe were molded symmetrically to begin with, but ANYWAY, they come to a slight "point" where the edges meet and it had nothing to do with the "edge" itself, as I had to file WAY back into the oil pan to make it flat, never min the glue smudges it had too! And if you look, the seam on the bottom of the Transmission, isn't any better! It was way worse on the oil pan! I may wind up changing the oil pan all together, but we'll see, I'm a ways from that stage!

Well there ya see the top side of the Transmission. I'm not happy with this, as that tail-housing is near impossible to repair! or well, make look right if that makes sense! AND, to be completely honest, I'm kinda-sorta leaning toward a 727 Torqueflite Automatic on this build anyway! SO, I'll be off to look and see what 1/24th Scale 727 Torqueflite Automatic Transmissions I have, as that one, I'm completely unsure of! (I may have to rob that Transmission from another kit if none are in my parts organizers!)
Thanks for following along, more to come! ENJOY!
So after digging a while to see what I had, comparing it, this is the best choice for this build as A LOT is going to happen to this engine, at this point, anything is possible! Remember, this car, isn't going to be "Stock", just over that, so Street Machine? I'm not sure what to call this one, BUT its definitely NOT "stock", or going to be anyway!
The engine I pulled out, isn't in the best of shape, It was pre-painted Testors Orange, the standard color Orange, The Transmission, needs SERIOUS help! The timing chain cover, and water pump were nothing more then a glob of glue smudges, and literally melted to the block! I had to mill off the entire thing to make the block flat again! I then while at it, and using the mill I decked the block, making the area where the heads sat, flat again (they were glued on and were not flush sitting on the engine, as well the intake was in bad shape too!) I milled the intake off AFTER removing the heads! I had fortunately saved the heads for being destroyed, but had to destroy the intake, as it wasn't even worth keeping with all the glue that bubbled up when whoever applied it to the engine! What a mess, but in my last pic, looks A LOT better, I did the mill work and then needed stripped which it went for a swim in the Purple Pond.
All that listed in the above picture.
Then, the BANE of my existence... that damned oil pan! The glue joints of even this part of a NEW engine by me, SUCK, they never seem to fit right on this model. The seams I don't believe were molded symmetrically to begin with, but ANYWAY, they come to a slight "point" where the edges meet and it had nothing to do with the "edge" itself, as I had to file WAY back into the oil pan to make it flat, never min the glue smudges it had too! And if you look, the seam on the bottom of the Transmission, isn't any better! It was way worse on the oil pan! I may wind up changing the oil pan all together, but we'll see, I'm a ways from that stage!
Well there ya see the top side of the Transmission. I'm not happy with this, as that tail-housing is near impossible to repair! or well, make look right if that makes sense! AND, to be completely honest, I'm kinda-sorta leaning toward a 727 Torqueflite Automatic on this build anyway! SO, I'll be off to look and see what 1/24th Scale 727 Torqueflite Automatic Transmissions I have, as that one, I'm completely unsure of! (I may have to rob that Transmission from another kit if none are in my parts organizers!)
Thanks for following along, more to come! ENJOY!
528-Hemi- Professionnel
- Messages : 463
Date d'inscription : 21/08/2016
Age : 46
Localisation : New Hampshire, USA
Emploi/loisirs : Retired, Model Railroading, Model Cars, Model Trucks, REAL Cars & Trucks, Restoring OLD car & Truck parts unusable, repurposed.
Humeur : Good
Re: 1969 Dodge Coronet R/T
par 528-Hemi Jeu 20 Avr - 1:14
So in my last posting as mentioned, I wasn't happy with the Transmission that the engine had attached to it. It was in bad shape, and need a lot of work and some of that work, I'm just not sure I was able (or in this case) willing to do! HOWEVER, that broken up Transmission would be GREAT for a 1/24th scale 4x4, as that tail-casing, would be removed to add a transfer case to it as a married couple, instead of a divorced set-up! SO, I'll hold onto it for that very reason! BUT It won't be used on this model. As I went looking through my parts organizers I had nothing, so I turned to going through the kits I had that might have had something, anything at this point! I got a glue bomb '71 Plymouth GTX, that had a 440 in it, and that 440 had an automatic coupled to it, and it too was a 440 6 barrel car! AND to that Monogram! So that says to me that its a 1/24th scale car, and the engine? in that GTX? was in horrible shape! The engine itself, had so much glue where the heads were glued onto the block, and the valve covers glued to the heads, you could not see where one part started and the other one stopped the glue was so bad! PLUS, to add salt to the wound, the exhaust manifolds were as just as bad and not even close aligned right! BUT............. The GOOD part? The transmission was unscathed in all this bad use of Testors glue! As well, the timing chain cover, water pump and oil filter were also in decent regards for use! SO I pulled out my trusty ole Razor-Saw, and off went the Timing Chain cover & Oil Pump, cut right into the block to get it too! THEN, off to the back of the block and cut into the block, to remove the Transmission! Good times, GOOD TIMES!

Off the Transmission went and right away into a set of clamps for gluing it together as after cutting it from the block it literally fell in-half, as it would have been on the sprue!!!! I was a happy guy seeing that happen actually!!!!

Glued together with a bit of Tenax 7R, and just enough pressure with the clamps, to create a little bulge seam..... PURPOSELY.... To be filed down to remove any seams when dry! One dimple in that Transmission Pan, as seen in the above picture, will get filled in as well!

Top of Transmission, the seam looks pretty damn good to me but will get a little sanding to make sure it disappears when painted!
Off the Transmission went and right away into a set of clamps for gluing it together as after cutting it from the block it literally fell in-half, as it would have been on the sprue!!!! I was a happy guy seeing that happen actually!!!!
Glued together with a bit of Tenax 7R, and just enough pressure with the clamps, to create a little bulge seam..... PURPOSELY.... To be filed down to remove any seams when dry! One dimple in that Transmission Pan, as seen in the above picture, will get filled in as well!
Top of Transmission, the seam looks pretty damn good to me but will get a little sanding to make sure it disappears when painted!
528-Hemi- Professionnel
- Messages : 463
Date d'inscription : 21/08/2016
Age : 46
Localisation : New Hampshire, USA
Emploi/loisirs : Retired, Model Railroading, Model Cars, Model Trucks, REAL Cars & Trucks, Restoring OLD car & Truck parts unusable, repurposed.
Humeur : Good
Re: 1969 Dodge Coronet R/T
par 528-Hemi Jeu 20 Avr - 1:15
So right after, getting those parts from the GTX, I cleaned them up for immediate use! The Timing Chain cover/Water Pump, was first in-line to be used! I got the back of it filed flat, and all the glue it had back there flat to then glue it to the front of the NEWLY re-done Hemi block! AND for being off a 440, it seemingly fit well, Monogram done their homework as that geometrical area of either the 426 Hemi or the 440 Wedge were very close the same in real life and looks good on the model! ALTHO, anyone who has built a '71 Hemi 'Cuda from Monogram, KNOWS that the Timing Chain Cover/Water Pump are something to be desired of! They look like a part off a Chevy I do believe just "swapped over" onto the Mopar engine! -Sure NOT a Mopar part, or even looks it! SO the 440 -6 Barrel part, looks a BUNCH better on the front of the Hemi! Have a look:

NICE!!! I have to say, this part was in a mess of other parts around it, but, ALL were unpainted! I didn't have to let 'er soak in the purple pond! Cut off, flatten cut, and glue on! Always nice when something has an easier approach I have to say! As you can see however, the yellow detail, has its Fuel Pump, and the Oil Filter in-Place.... Which these little things will be getting they're share of detailing when all-said-and-done!
Then, right off to adding the Transmission! It was in good enough shape and right into place it went after the Bell-Housing of the Transmission was filled flat and smooth to make a decent joint between it, and the engine block!

Fits & looks pretty good!!! I'm pleased with this! I can't say just how well this all went together, almost as if, it was meant for it!

Not to shabby! I'm liking how this all looks, BUT it needs a lot of details and some work to make it "the Part" its being built to be! HEY.. thats just like a REAL car! Only this way is cheaper!

-Just the other side!

THEN some work, when I was filling the Transmission flat where the Bell-Housing meets the Block, I noticed that the Oil Pan and spacing was slightly "off", as the Pan needed a "lip" in front of the Bell-Housing, BUT this detail left a gap in the plastic, so if you look, between the back of the Oil Pan, and the front of the Transmission, you can see a little "white block" That was a piece of block Styrene I had, filled to fit, and glued in-place, to dry, and then filed to shape BEFORE the Transmission went onto the block! And yet again, you get to see the BANE of my existence, that damned Oil Pan! GRRRRR -That thing has GOT TO change!


2 pics. YES 2! Why? WELL I filled in that "dimple" that was in the Transmission Pan, and I tried getting a pic of it, and sadly, it would NOT show where it was, on the model! In an earlier pic, it stuck out like a sore thumb, then I filled it in, and the thing literally disappeared, which is what ya want it to do, but dang, to "show" where you filled it in, was a interesting task to do! The pic with the flash on, the (first one of this set), doesn't show it. The second pic, (in this set) shows it a little bit, with NO camera flash! Gotta love good camera tricks, and I am not even planning them that way!
Thats it for now, more to come as I get things done, next to happen? That Oil Pan...... Its leaving, like a herd of Turtles!!! 8D
Thanks for looking & following along, ENJOY!
NICE!!! I have to say, this part was in a mess of other parts around it, but, ALL were unpainted! I didn't have to let 'er soak in the purple pond! Cut off, flatten cut, and glue on! Always nice when something has an easier approach I have to say! As you can see however, the yellow detail, has its Fuel Pump, and the Oil Filter in-Place.... Which these little things will be getting they're share of detailing when all-said-and-done!
Then, right off to adding the Transmission! It was in good enough shape and right into place it went after the Bell-Housing of the Transmission was filled flat and smooth to make a decent joint between it, and the engine block!
Fits & looks pretty good!!! I'm pleased with this! I can't say just how well this all went together, almost as if, it was meant for it!
Not to shabby! I'm liking how this all looks, BUT it needs a lot of details and some work to make it "the Part" its being built to be! HEY.. thats just like a REAL car! Only this way is cheaper!
-Just the other side!
THEN some work, when I was filling the Transmission flat where the Bell-Housing meets the Block, I noticed that the Oil Pan and spacing was slightly "off", as the Pan needed a "lip" in front of the Bell-Housing, BUT this detail left a gap in the plastic, so if you look, between the back of the Oil Pan, and the front of the Transmission, you can see a little "white block" That was a piece of block Styrene I had, filled to fit, and glued in-place, to dry, and then filed to shape BEFORE the Transmission went onto the block! And yet again, you get to see the BANE of my existence, that damned Oil Pan! GRRRRR -That thing has GOT TO change!
2 pics. YES 2! Why? WELL I filled in that "dimple" that was in the Transmission Pan, and I tried getting a pic of it, and sadly, it would NOT show where it was, on the model! In an earlier pic, it stuck out like a sore thumb, then I filled it in, and the thing literally disappeared, which is what ya want it to do, but dang, to "show" where you filled it in, was a interesting task to do! The pic with the flash on, the (first one of this set), doesn't show it. The second pic, (in this set) shows it a little bit, with NO camera flash! Gotta love good camera tricks, and I am not even planning them that way!
Thats it for now, more to come as I get things done, next to happen? That Oil Pan...... Its leaving, like a herd of Turtles!!! 8D
Thanks for looking & following along, ENJOY!
528-Hemi- Professionnel
- Messages : 463
Date d'inscription : 21/08/2016
Age : 46
Localisation : New Hampshire, USA
Emploi/loisirs : Retired, Model Railroading, Model Cars, Model Trucks, REAL Cars & Trucks, Restoring OLD car & Truck parts unusable, repurposed.
Humeur : Good
Re: 1969 Dodge Coronet R/T
par 528-Hemi Jeu 20 Avr - 1:15
So I had said that I was going to do something with that Oil Pan..... The BANE of my existence! (I hate the thing, its looks, the whole balla wax!) SO, what was I gonna do with it, WELL I had to first look at what I had to work with, within the model of the existing Oil Pan, and what I could and couldn't do. WELL, as it is, the only half ways decent part of the whole part? The flange that would bolt to the engine block "Skirt".... Thats about ALL that was good about it. WELL with that said, the first thing I did was cut off that God-Awful Sump! It just had NOTHING to offer that said "Mopar" on it, but once cut-off, what was I going to do then? WELL, first things first, I had to see what it was like sitting in the frame! THAT was an interesting task, to say the least! As the frame wasn't made to have a drop-in fit to the 426 Hemi no matter if it did come from a 1/24th scale model! I had to do a little tweaking of the frame to get it to fit, and with the sump gone, made that just a tad easier to do, and then with the frame (at the time) still together, meaning the front suspension and K member was there, showed me not only that I had to do some tweaking on the engine mounts, BUT, also tweak the Firewall as it wasn't made to have an engine of this size put into the car! As I was going and just "sitting" the engine in the frame, its going to be really interesting when I get to getting the engine into the frame, and the interior into the body, as well as putting the Radiator Core Support in-place.... BUT thats to come, right now, its the engine in the frame, and getting the Oil Pan ready to be built to "sit" between the frame rails correctly! WELL that being said, I had to modify the Transmission, and then slightly modify the Transmission mount too! THEN once done, I'd be able to see what the Oil Pan Sump could become! So I got to the point on the frame that I could "see" what was able to be done, for the Oil Pan Sump, to be re-made to something OTHER then what the engine had, which was something I just was not feeling, on this build or any other 1/24th scale build that has the same engine, The Oil Pan just isn't a Hemi Oil Pan....
SO with all that said, after I got the engine to sit in the frame, and seen what was open for the Sump, I began....


I took and began by making a pretty thick plate to start to have a base to mount too.... THEN, I began "stacking" to get a lump of plastic to work with and get to have something to shape into what would become a Sump, and a better one, and at this point, I began thinking, I was building this car other then Stock, and above that even, NOT exactly "Pro-Stock" but maybe Street Machine/Pro-Street? (I'm not exactly sure what this might be classed as to where I'm going with it!)
So I got right to shaping it to become what would resemble a Milodon Oil Pan....


Looking A LOT better then what was originally on there!!!! I'm pleased with this out come and it fits into the frame rails with the front suspension in-place still as well as the mounting of the whole works, leveled right out.... The only other fitting issues was between the Radiator Core Support, and the Firewall! I got some work to do in those places as this block is pretty long and the 440 that was to the kit wasn't nearly as big! (The 426 Hemi wasn't called the "Elephant" for nothing!
So while I had the plastic out to build up the Sump in the Oil Pan, I went on to use some of it to make the Oil Filter pump & mount, as there was nothing there for that detail, and having that Filter on the Timing Chain Cover, was nice for positioning that all in-place, I have yet to make the Filter mount facing too that leads back into the pump housing, and mount.

A little to add to it yet for detail sake, BUT, once done a little work with a file, and I'll be golden to continue detailing!

Doesn't look bad at that angle! Be better with all the details around it and then painted I think it'll look good!
Stay tuned, more to come! As always Comments always welcome!
SO with all that said, after I got the engine to sit in the frame, and seen what was open for the Sump, I began....
I took and began by making a pretty thick plate to start to have a base to mount too.... THEN, I began "stacking" to get a lump of plastic to work with and get to have something to shape into what would become a Sump, and a better one, and at this point, I began thinking, I was building this car other then Stock, and above that even, NOT exactly "Pro-Stock" but maybe Street Machine/Pro-Street? (I'm not exactly sure what this might be classed as to where I'm going with it!)
So I got right to shaping it to become what would resemble a Milodon Oil Pan....
Looking A LOT better then what was originally on there!!!! I'm pleased with this out come and it fits into the frame rails with the front suspension in-place still as well as the mounting of the whole works, leveled right out.... The only other fitting issues was between the Radiator Core Support, and the Firewall! I got some work to do in those places as this block is pretty long and the 440 that was to the kit wasn't nearly as big! (The 426 Hemi wasn't called the "Elephant" for nothing!
So while I had the plastic out to build up the Sump in the Oil Pan, I went on to use some of it to make the Oil Filter pump & mount, as there was nothing there for that detail, and having that Filter on the Timing Chain Cover, was nice for positioning that all in-place, I have yet to make the Filter mount facing too that leads back into the pump housing, and mount.
A little to add to it yet for detail sake, BUT, once done a little work with a file, and I'll be golden to continue detailing!
Doesn't look bad at that angle! Be better with all the details around it and then painted I think it'll look good!
Stay tuned, more to come! As always Comments always welcome!
528-Hemi- Professionnel
- Messages : 463
Date d'inscription : 21/08/2016
Age : 46
Localisation : New Hampshire, USA
Emploi/loisirs : Retired, Model Railroading, Model Cars, Model Trucks, REAL Cars & Trucks, Restoring OLD car & Truck parts unusable, repurposed.
Humeur : Good
Re: 1969 Dodge Coronet R/T
par 528-Hemi Jeu 20 Avr - 1:16
So while I was getting ready to paint the engine now, I had to think what I wanted it to look like.... VERY good question! I know I wanted the block and all the parts to it to be the factory "Hemi Orange", BUT with that, I wanted something above the block different, the Heads, and Valve Covers, and possibly the Intake. As far as color and looks go. At this point, I wasn't even sure what Intake I was going ot use! As I wasn't feeling the in-line 2x4 Intake the engine would have had from stock as a Street Car! I wanted something more to it, then that! SO, I went on to tape off the top of the block, where the Heads would go, and the Intake! As they weren't going to be the same. Once that was all taped off, to the Air Brush I went! Got the whole block painted Hemi Orange, and let to dry! I got but one pic of it after it was dry....

That newly made Oil Pan looks GREAT all painted up!
So now, you know that something more is going to happen to this engine, so then I got right to making things happen! The Heads? WILL BE Aluminum, and they will have a Head Gasket, to simulate the engine has been Stroked, in use with the Aluminum heads, built to run....

In-place with the gaskets! And as you can see, they're BIG and thick to raise the Heads up off the block to signify that the engine has been stroked, and had the pistons inside, running Top-Dead-Center, out of the hole and need a thicker Head Gasket to slightly lower the Compression, to Street use!
I have to trim the gaskets in places to make it all look right but painted to look like good "crushing" type gasket!


Will give it the right look! When the Heads are on the block, it'll look so good!!!!
NICE! Notice the "extra" detail in the Oil Pump area? -I removed the Oil Filter, as I wasn't feeling it as I have better Resin Detail to replace the factory one, and look much more realistic!

From the back..... I know it needs some trimming and all BUT that will happen once the Heads are on the block, as that will guide me to make the proper cuts to "trim" the gaskets, and then I'll go back and touch up the paint on them!
This will all look GREAT when the heads are on the block! I'm almost sure of it! Which is coming, Stay tuned, more to come! Comments welcome & enjoyed, thanks for following along!
That newly made Oil Pan looks GREAT all painted up!
So now, you know that something more is going to happen to this engine, so then I got right to making things happen! The Heads? WILL BE Aluminum, and they will have a Head Gasket, to simulate the engine has been Stroked, in use with the Aluminum heads, built to run....
In-place with the gaskets! And as you can see, they're BIG and thick to raise the Heads up off the block to signify that the engine has been stroked, and had the pistons inside, running Top-Dead-Center, out of the hole and need a thicker Head Gasket to slightly lower the Compression, to Street use!
I have to trim the gaskets in places to make it all look right but painted to look like good "crushing" type gasket!
Will give it the right look! When the Heads are on the block, it'll look so good!!!!
NICE! Notice the "extra" detail in the Oil Pump area? -I removed the Oil Filter, as I wasn't feeling it as I have better Resin Detail to replace the factory one, and look much more realistic!
From the back..... I know it needs some trimming and all BUT that will happen once the Heads are on the block, as that will guide me to make the proper cuts to "trim" the gaskets, and then I'll go back and touch up the paint on them!
This will all look GREAT when the heads are on the block! I'm almost sure of it! Which is coming, Stay tuned, more to come! Comments welcome & enjoyed, thanks for following along!
528-Hemi- Professionnel
- Messages : 463
Date d'inscription : 21/08/2016
Age : 46
Localisation : New Hampshire, USA
Emploi/loisirs : Retired, Model Railroading, Model Cars, Model Trucks, REAL Cars & Trucks, Restoring OLD car & Truck parts unusable, repurposed.
Humeur : Good
Re: 1969 Dodge Coronet R/T
par 528-Hemi Jeu 20 Avr - 1:16
Well the time is coming, I have to pick out what Intake style and type I want to use on this one..... I was stumped on it for a bit, as I didn't want to use the 2x4 Inline Intake that came with the engine (I have replacements), So that one is OUT.... So that means the car won't be an A102 car! BUT the other possibilities!? I thought about a Tunnel-Ram.... But, that would sit really high on an already high block in the car, and the hood is cut out for the 440 6 Pack set up anyway, and I wasn't all that interested in that Hood Scoop on this car! -Not to say I wouldn't mind another type Hood Scoop, just not the one stock to the kit! SO, I just wasn't feeling that either.... What about a Blower? Same thing! Altho, the hood would merely only need the Hood Scoop hole enlarged! Possible! OR a Cross-Ram Intake? HMMMM That make it sort of a A990.... I haven't done a model with an A990............YET! I actually like the sounds of that! SO, with that, I went on to the parts organizers to see what I had for a Cross-Ram Intake to fit this engine..... OR if I had something, I'd have to modify a bit to fit as the engine has had the Cosmetic Gaskets added for looks which in real life you'd have to add the same type gaskets with matching thickness between the Heads and the Intake too to make up the difference! So while looking, I found a FEW choices of Cross-Ram Intakes, some were "OK" others, were NEVER gonna happen but then I found SOME that could be made to look really good and be an almost PERFECT fit! The one I choose just so happened to be a Glue Bomb part too! Needed a little work to clean it up and test fit it. So I got it all to fit, and added whatever was needed to fit, and got a couple coats of paint on it, before going onto the engine! While the Intake was drying I went to see what I had for Valve Covers too.... As they're in the same Organizer, so. might as well pull them out and detail those up to fit the purpose. Chrome is the way here, and I had one good set that wasn't a Glue Bomb part, so. I went right on to detailing them as best I could! I turned my own PCV fitting/seal, painted the plug boots on the valve covers, drilled holes for the plug wire boots to be put in and glued from the underside, and allowed to be "open" to insert the Plug Wire wires when the time came for them. By the time all this was done, the Intake was ready to go in-place on the engine!
Once dry, it looked GREAT and on the motor it went!

I also painted the Water Pump Testors "Chrome" and the Fuel Pump Testors Steel.

A good view of the Plug Wire Boots thats been painted, Testors Rubber color....

From the back the over-all spacing of the Intake looks real good!

Valve covers sit just below the edges of the Cross-Ram Intake and looks good! I like how this is all turning out! Granted with an Intake that sits as high as this one does, I'm going to be required to use a rather large Hood Scoop! BUT thats OK, just as long as its not the stock one to the kit.... I'm going for a different look to the whole model!
Its shaping right up, and starting to look like a Hemi! So.... That begs to ask hows the "fit" in the frame rails? Does that very well, BUT with the body on the frame? NOT SO GOOD! I'll definitely be trimming things down, and making this semi-straight, as I seen some aspects of the model that are going to need addressed in order for this engine to sit right in the engine bay! The Firewall isn't 100% vertical, the bottom edge of it leans toward the engine, just over 1/16th of an inch! SO, I'll be figuring out a way to make it vertical, or semi-close to what it was, and then the lip that arches from one side to the other, that gives the Firewall a slight "inset" will be addressed then as I could really use the pace to fit this beast in that engine bay, PLUS I haven't picked what I plan to use for Exhaust yet, stock manifolds, Petty Headers, underbody Headers, I don't know yet! SO, I'll be needing some space to add all that! -Thought about even moving the Radiator Core Support forward just a little too! And I may have too! I gotta fit the belts and pulleys in there yet with a fan! 8D
Just thinkin' outloud here..... As I have some thinking to do, and how I wanna go about fitting this engine into that Engine Bay, and all.... It really is that tight!
Again, thats all for now! Stay tuned! More to come as I get things done, thanks for following along! ENJOY!
Once dry, it looked GREAT and on the motor it went!
I also painted the Water Pump Testors "Chrome" and the Fuel Pump Testors Steel.
A good view of the Plug Wire Boots thats been painted, Testors Rubber color....
From the back the over-all spacing of the Intake looks real good!
Valve covers sit just below the edges of the Cross-Ram Intake and looks good! I like how this is all turning out! Granted with an Intake that sits as high as this one does, I'm going to be required to use a rather large Hood Scoop! BUT thats OK, just as long as its not the stock one to the kit.... I'm going for a different look to the whole model!
Its shaping right up, and starting to look like a Hemi!
Just thinkin' outloud here..... As I have some thinking to do, and how I wanna go about fitting this engine into that Engine Bay, and all.... It really is that tight!
Again, thats all for now! Stay tuned! More to come as I get things done, thanks for following along! ENJOY!
528-Hemi- Professionnel
- Messages : 463
Date d'inscription : 21/08/2016
Age : 46
Localisation : New Hampshire, USA
Emploi/loisirs : Retired, Model Railroading, Model Cars, Model Trucks, REAL Cars & Trucks, Restoring OLD car & Truck parts unusable, repurposed.
Humeur : Good
Re: 1969 Dodge Coronet R/T
par 528-Hemi Jeu 20 Avr - 1:17
So having mentioned about the engine being so big, (Yes it is afterall a Hemi!) it doesn't fit well into the engine bay! As this car, was made by Monogram, it has its limitations for details and even in some areas correctness. One issue I found, because its Monogram, the Firewall has little to no detail on it, (they were kinda "plain" and bare back in the day anyway) BUT, this model has some serious detail issues within the Firewall alone! One, no details, for a heater, not even dimples to add your own hoses! Two, it has a wiper motor, but thats to be desired of! Three, No sort of wiring at all. Four, The firewall itself, isn't made right. Couple things I noticed right off the bat. WELL the firewall structure is off. The curved lip that goes from side to side and bows up to just under the hood, should be a Lip, NOT a shelf of sorts, its a drip-edge! Monogram made it, sure enough, but made it in such a way, that its more of a shelf look, then a drip edge. Plus, just below that, the flat part, that goes down to just above the transmission opening, that sheet metal in real life is almost vertical, to the car! On the model, however, they made it to lean inward toward the engine at the bottom, so it leans into the engine bay, just over 3/32nds of an inch. Which in an area thats limited to begin with, thats a bit of space! Specially when your trying to shoe-horn a Hemi in that space! SO, I'll be doing as much as I can to correct this! As that might be enough space in the back, to gain to get the engine to "sit" in-place, with no radiator and Core Support there. I'll address when I get that far! But for now, its the Firewall, and inner fenders I have to deal with and correct as best I can, to get the Hemi to sit in-place with no touching its surroundings, side-to-side, and in the back!
So to move right along, I got to looking at the best way I could make those corrections....

YEP! I'm cutting the entire part out of the body! -There is however a GOOD reason for this, as you'll see as you follow along!


All cut out, and the car body itself, cleaned up, and should be ready at any time to have it replaced once the corrections are made! A little dusty, but for now thats OK, I got to make some dust to make it semi-correct!


A couple shots of just the inner engine compartment after being removed from the cars body.... As you can see, there are a lot of details it lacks! Thats all about to change!!!!
Stay tuned, more to come! Comments welcome, ENJOY!
So to move right along, I got to looking at the best way I could make those corrections....
YEP! I'm cutting the entire part out of the body! -There is however a GOOD reason for this, as you'll see as you follow along!
All cut out, and the car body itself, cleaned up, and should be ready at any time to have it replaced once the corrections are made! A little dusty, but for now thats OK, I got to make some dust to make it semi-correct!
A couple shots of just the inner engine compartment after being removed from the cars body.... As you can see, there are a lot of details it lacks! Thats all about to change!!!!
Stay tuned, more to come! Comments welcome, ENJOY!
528-Hemi- Professionnel
- Messages : 463
Date d'inscription : 21/08/2016
Age : 46
Localisation : New Hampshire, USA
Emploi/loisirs : Retired, Model Railroading, Model Cars, Model Trucks, REAL Cars & Trucks, Restoring OLD car & Truck parts unusable, repurposed.
Humeur : Good
Re: 1969 Dodge Coronet R/T
par 528-Hemi Jeu 20 Avr - 1:17
So moving right along, the first order of business, was that sheet, below the curved drip-edge. It was leaning inward toward the back of the engine just over 3/32nds of an inch, from what I could tell. It may be a little more then that, BUT, thats where I'm starting on it. I MAY have to add a bit more to it however, we'll see when the kits molded in-place section, is removed!

That section is now removed! Not yet cleaned up to be certain of how far the bottom edge leaned inward, as once all cleaned up, that will then show just how much I have to build up and reshape in that area before NEW sheet is installed!

In the process of cleaning up that cuts on the passenger side!

Cleaning up of the Driver's side!
All in the while cleaning that curved drip edge to.... That thing was fun to re-shape/clean up from the cuts to make symetrical to the parts side-to-side! PLUS an added bonus, cleaning around the knock-out for the Wiper Motor area as well! THEN the fun begins, back fill. I'll have to use thickness of evergreen styrene strip(s) to get the lower corner, of the backs of inner fender wells built out, toward to the interior, Granted using strips, I'll be building out the tops too. Once the distance at the bottom is made up, I'll file back the tops to the top corners where it all comes together leaving the bottoms alone, which will have a white taper look when all said and done. Once that is all done, I'll then go back with a file and "shape" to the inner fender well contours, to look the part on the inside of the Inner Fenders. The outside in the wheel wells I'll address later. I'm not sure how much plastic will wind up out there at this point!
After the cuts were cleaned up, I mentioned that it leaned inward at the bottom, just over 3/32nds, I was wrong! It was a pencil line over 7/64ths!!!! -Just under 1/8th inch! Which is a bit more then I first thought but once all cleaned up, NOW I know what I have to build up to, and file back at the top to get this all vertical again! Which for what I'm doing here is quite a bit, a bit more then I first thought but all in a good way, as I need that space (whatever space) I can gain, to get that engine in this car!
So while I had the Evergreen strip out, I thought, I'm going to gain a bit in the back, and seemingly enough, I KNOW With the length of the engine with the water pump and pulleys and fan in the front, I'm going to need just a tad more.... SO I got right to adding the strip in the front of the inner fenders too! I gained at least 3/32nds there too! -I know I'll have to go back and trim down the Radiator Core Support grille spacers, but thats OK.... I'm not that far along yet!


You can see the added bottom end thickness to get the angle corrected to vertical! That is in fact true 100% vertical now! I got the vertical angle corrected, and then went right to "shaping" the strip to the contour of the inner fenders, on both sides, and let the back side of it slone for now! As I got a bit of work to do on the inside and will worry about the outside of the engine bay when I'm done, on the inside!

As mentioned, added the striping to the fronts of the inner fenders, I am going to need the extra space length-wise to fit that Hemi in this little area!!!!
Now The real work is coming. Fitting NEW sheet in-place of what was removed! And have all the contours line up.... -Gonna be a fun task!
Stay tuned, more to follow! Thanks for looking & following along as always comments welcome, ENJOY!
That section is now removed! Not yet cleaned up to be certain of how far the bottom edge leaned inward, as once all cleaned up, that will then show just how much I have to build up and reshape in that area before NEW sheet is installed!
In the process of cleaning up that cuts on the passenger side!
Cleaning up of the Driver's side!
All in the while cleaning that curved drip edge to.... That thing was fun to re-shape/clean up from the cuts to make symetrical to the parts side-to-side! PLUS an added bonus, cleaning around the knock-out for the Wiper Motor area as well! THEN the fun begins, back fill. I'll have to use thickness of evergreen styrene strip(s) to get the lower corner, of the backs of inner fender wells built out, toward to the interior, Granted using strips, I'll be building out the tops too. Once the distance at the bottom is made up, I'll file back the tops to the top corners where it all comes together leaving the bottoms alone, which will have a white taper look when all said and done. Once that is all done, I'll then go back with a file and "shape" to the inner fender well contours, to look the part on the inside of the Inner Fenders. The outside in the wheel wells I'll address later. I'm not sure how much plastic will wind up out there at this point!
After the cuts were cleaned up, I mentioned that it leaned inward at the bottom, just over 3/32nds, I was wrong! It was a pencil line over 7/64ths!!!! -Just under 1/8th inch! Which is a bit more then I first thought but once all cleaned up, NOW I know what I have to build up to, and file back at the top to get this all vertical again! Which for what I'm doing here is quite a bit, a bit more then I first thought but all in a good way, as I need that space (whatever space) I can gain, to get that engine in this car!
So while I had the Evergreen strip out, I thought, I'm going to gain a bit in the back, and seemingly enough, I KNOW With the length of the engine with the water pump and pulleys and fan in the front, I'm going to need just a tad more.... SO I got right to adding the strip in the front of the inner fenders too! I gained at least 3/32nds there too! -I know I'll have to go back and trim down the Radiator Core Support grille spacers, but thats OK.... I'm not that far along yet!
You can see the added bottom end thickness to get the angle corrected to vertical! That is in fact true 100% vertical now! I got the vertical angle corrected, and then went right to "shaping" the strip to the contour of the inner fenders, on both sides, and let the back side of it slone for now! As I got a bit of work to do on the inside and will worry about the outside of the engine bay when I'm done, on the inside!
As mentioned, added the striping to the fronts of the inner fenders, I am going to need the extra space length-wise to fit that Hemi in this little area!!!!
Now The real work is coming. Fitting NEW sheet in-place of what was removed! And have all the contours line up.... -Gonna be a fun task!
Stay tuned, more to follow! Thanks for looking & following along as always comments welcome, ENJOY!
528-Hemi- Professionnel
- Messages : 463
Date d'inscription : 21/08/2016
Age : 46
Localisation : New Hampshire, USA
Emploi/loisirs : Retired, Model Railroading, Model Cars, Model Trucks, REAL Cars & Trucks, Restoring OLD car & Truck parts unusable, repurposed.
Humeur : Good
Re: 1969 Dodge Coronet R/T
par 528-Hemi Jeu 20 Avr - 1:18
So now, the fun begins! I have to set out and make a new firewall "skirt" I guess you could call it, that wasn't made right from the factory on the kit. Granted, if it was to be angled in any direction, I can see it leaning rear-ward from the curved drip edge... BUT forward, just makes no sense! ANYWAY, enough of that...
I took and got out some card stock (or heavy paper) and began playing with angles, sizes, and placement. I'd rather waste paper goods then plastic! Plus, its easier to cut and if its heavy, makes for a GREAT template!
I got everything semi-close to what it needed to be, within a pencil line of full on contact with all surrounding surfaces.... Which looked GREAT tightly fitting with the template, then it was off to find sheet styrene to make the part with... Once that was figured out on what thickness I was going to use, I went on to do the template work and transferring that shape onto the plastic, and then went on to cut it out, file to fit when cut out (I always cut a pencil line thickness BIGGER), to then file back to actual shape and contour, fitting to the part as I go.... Thats how I get thee tightest possible fit of part!

In-Place it went!!!! And looks a lot better too! I'll be able to now add some real detail to this thing, PLUS fit a Hemi in front of it!

While I had the file out and was shaping/fitting things, I contoured the inside of the FRONT inner fender extensions I made.... I left the back side (Wheel Well side) alone as I may need that "extra" surface for gluing when all together! I DID however contour just the tops as you can see, theres a reason for this that is to come!
While playing with that all, I also noticed another detail I wasn't happy nor fond of...... the Washer Fluid tank. I did NOT care for how it was molded into the inner fender, As they didn't not have a lower extension, nor did they have the inner fender molded to come to it, like a shelf as Monogram had made it. SO, I cut the thickness true of what it would have been for size, and then files smooth and back filled! The trick to back filling here was simple yet easy! (2 things not often said in one sentence!) I took tape, and taped the front of the hole once all was filed smooth.... THEN I mixed & poured resin from the back.... POOF 8 minutes later, the resin was cure, and then peel off the tape, and just lightly touch super glue (CA) to the line between the plastic and the resin to "seal" the joint and hold it all in-place. Lightly sanded smooth with 800 grit sand paper, and let alone, thand then inside the wheel well I did the same thing, I just did not sand it smooth yet!

A few of the things I was speaking of, pointed out here!!!!


Just a few pics here to show level and depth of details! And thats just the beginning!
I took and got out some card stock (or heavy paper) and began playing with angles, sizes, and placement. I'd rather waste paper goods then plastic! Plus, its easier to cut and if its heavy, makes for a GREAT template!
I got everything semi-close to what it needed to be, within a pencil line of full on contact with all surrounding surfaces.... Which looked GREAT tightly fitting with the template, then it was off to find sheet styrene to make the part with... Once that was figured out on what thickness I was going to use, I went on to do the template work and transferring that shape onto the plastic, and then went on to cut it out, file to fit when cut out (I always cut a pencil line thickness BIGGER), to then file back to actual shape and contour, fitting to the part as I go.... Thats how I get thee tightest possible fit of part!
In-Place it went!!!! And looks a lot better too! I'll be able to now add some real detail to this thing, PLUS fit a Hemi in front of it!
While I had the file out and was shaping/fitting things, I contoured the inside of the FRONT inner fender extensions I made.... I left the back side (Wheel Well side) alone as I may need that "extra" surface for gluing when all together! I DID however contour just the tops as you can see, theres a reason for this that is to come!
While playing with that all, I also noticed another detail I wasn't happy nor fond of...... the Washer Fluid tank. I did NOT care for how it was molded into the inner fender, As they didn't not have a lower extension, nor did they have the inner fender molded to come to it, like a shelf as Monogram had made it. SO, I cut the thickness true of what it would have been for size, and then files smooth and back filled! The trick to back filling here was simple yet easy! (2 things not often said in one sentence!) I took tape, and taped the front of the hole once all was filed smooth.... THEN I mixed & poured resin from the back.... POOF 8 minutes later, the resin was cure, and then peel off the tape, and just lightly touch super glue (CA) to the line between the plastic and the resin to "seal" the joint and hold it all in-place. Lightly sanded smooth with 800 grit sand paper, and let alone, thand then inside the wheel well I did the same thing, I just did not sand it smooth yet!
A few of the things I was speaking of, pointed out here!!!!
Just a few pics here to show level and depth of details! And thats just the beginning!
528-Hemi- Professionnel
- Messages : 463
Date d'inscription : 21/08/2016
Age : 46
Localisation : New Hampshire, USA
Emploi/loisirs : Retired, Model Railroading, Model Cars, Model Trucks, REAL Cars & Trucks, Restoring OLD car & Truck parts unusable, repurposed.
Humeur : Good
Re: 1969 Dodge Coronet R/T
par 528-Hemi Jeu 20 Avr - 1:19
So because of the nature of whats been goin on with this build, I had to sit the engine bay innards a side to dry and fully cure as there are some weak points in working with it, and once it all dried and cured, those weak points would be a bit easier to handle as the weakness of the factory plastic is in the top rear corners! The cross plating, will strengthen that right up! BUT it had to cure first.
SO that got me thinking, I'm putting in a A990 type Hemi (with a higher cubic inch then the 426) And been toying with the HIGH out put of the engine being built with a Cross-Ram Intake, SO, what kinda tires and rims do I want for this one? WELL, not stock I can say that fir sure, I'm not going stock on a lot of this kit so. thats OUT. BUT customized Stock, now theres an idea! Tires? I think I'm gonna go Stock type skinnies in the front Polyglas 15's..... Semi-Stock, small sure (I am after all going for a "Racked" stance on this one!) SO that leaves me with what type rims, and what type rear tires! WELL digging through my tires organizer, I found a set of 2 fronts of the Good Year Polyglas GT 15's.... so theres the fronts! THEN, I find a set of Good Year Blue Streak, Racing Specials 15's too! WELL theres the rear tires! NOW comes the quest of what rims do I want on this car? WELL I had a little bit of a choice because of tire type being used, and all, BUT what did I had that fit, AND look right in the Good Year Blue Streak, Racing Specials tires? That was an issue, as the rims I was leaning toward using did not have a deep dished wheel in any one of the sets I had that were Deep Dished. Plus, the rims I wanted to use, were NEVER made with a deep dished for a wide tire.... SO that means, I have to seek out to make my own set of rims! WELL NOW, theres a FIRST for me! I haven't never one time made any refinements or customizations to rims.... BUT, I have seen a few people that have and thought, why not? I have the ability, so. here goes nothing....... I choose my FAVORITE Mopar rim...... The Mopar "Rallye", and then went looking in my scrap mixed & matched rims to see if I had a broken set of deep dished wheels, that I wasn't fond of. And I had a set, and that meant off to the Unimat Lathe I go. I chuck the Deep Dished rim into the headstock and turn the backs right off the rim..... This gives me the deepness I need...... THEN I take 2 of the Rallye rims and chuck them into the Lathe and turn off just the rims outward facing lip, and just enough of the chrome face, to give a smooth finish for nice and straight glue joints! I Test fit the ring, to the rim, in the tire with the backs I planned to use, to get how deep the ring would have to go into the tire, to fit properly.... Got those measurements on the Lathe and cut them twice, one time for each wheel that goes into the Good Year Blue Streak, Racing Special tires for the back!
So a set of 4 of these:

Taken the other 2 and in the lathe made this happen:

On the deep dished versions you can see the glue line. ALL gluing was done on the outside (inner) part of the rims! So that the Chrome on the inside was untouched by glue to ruin the finish!

Those look GREAT!!!!!

Me holding one of the deep dished rims to show the nice inner chrome unharmed by the gluing process!!!! I'm VERY pleased with how that came out (I can almost guarantee that I'll be doing this AGAIN in the future! Then, while the glue dried on the deep dished rims, and the paint dried on the wheel backs, I got right to putting the white letters on the tires with my Gelly Roll Gel Pen, and as soon as it was dry, I assembled the tires and rims together to be ready to go onto the car!


Those look GREAT!!!!!! I also went to do a little "wear" on all 4 tire treads, to look used.....
So then, now I'll have to see whats all involved, to fit these tires to the frame!!!! That should prove interesting too!
Thanks for following along, as always comments always welcome, ENJOY!!!!
SO that got me thinking, I'm putting in a A990 type Hemi (with a higher cubic inch then the 426) And been toying with the HIGH out put of the engine being built with a Cross-Ram Intake, SO, what kinda tires and rims do I want for this one? WELL, not stock I can say that fir sure, I'm not going stock on a lot of this kit so. thats OUT. BUT customized Stock, now theres an idea! Tires? I think I'm gonna go Stock type skinnies in the front Polyglas 15's..... Semi-Stock, small sure (I am after all going for a "Racked" stance on this one!) SO that leaves me with what type rims, and what type rear tires! WELL digging through my tires organizer, I found a set of 2 fronts of the Good Year Polyglas GT 15's.... so theres the fronts! THEN, I find a set of Good Year Blue Streak, Racing Specials 15's too! WELL theres the rear tires! NOW comes the quest of what rims do I want on this car? WELL I had a little bit of a choice because of tire type being used, and all, BUT what did I had that fit, AND look right in the Good Year Blue Streak, Racing Specials tires? That was an issue, as the rims I was leaning toward using did not have a deep dished wheel in any one of the sets I had that were Deep Dished. Plus, the rims I wanted to use, were NEVER made with a deep dished for a wide tire.... SO that means, I have to seek out to make my own set of rims! WELL NOW, theres a FIRST for me! I haven't never one time made any refinements or customizations to rims.... BUT, I have seen a few people that have and thought, why not? I have the ability, so. here goes nothing....... I choose my FAVORITE Mopar rim...... The Mopar "Rallye", and then went looking in my scrap mixed & matched rims to see if I had a broken set of deep dished wheels, that I wasn't fond of. And I had a set, and that meant off to the Unimat Lathe I go. I chuck the Deep Dished rim into the headstock and turn the backs right off the rim..... This gives me the deepness I need...... THEN I take 2 of the Rallye rims and chuck them into the Lathe and turn off just the rims outward facing lip, and just enough of the chrome face, to give a smooth finish for nice and straight glue joints! I Test fit the ring, to the rim, in the tire with the backs I planned to use, to get how deep the ring would have to go into the tire, to fit properly.... Got those measurements on the Lathe and cut them twice, one time for each wheel that goes into the Good Year Blue Streak, Racing Special tires for the back!
So a set of 4 of these:
Taken the other 2 and in the lathe made this happen:
On the deep dished versions you can see the glue line. ALL gluing was done on the outside (inner) part of the rims! So that the Chrome on the inside was untouched by glue to ruin the finish!
Those look GREAT!!!!!
Me holding one of the deep dished rims to show the nice inner chrome unharmed by the gluing process!!!! I'm VERY pleased with how that came out (I can almost guarantee that I'll be doing this AGAIN in the future! Then, while the glue dried on the deep dished rims, and the paint dried on the wheel backs, I got right to putting the white letters on the tires with my Gelly Roll Gel Pen, and as soon as it was dry, I assembled the tires and rims together to be ready to go onto the car!
Those look GREAT!!!!!! I also went to do a little "wear" on all 4 tire treads, to look used.....
So then, now I'll have to see whats all involved, to fit these tires to the frame!!!! That should prove interesting too!
Thanks for following along, as always comments always welcome, ENJOY!!!!
528-Hemi- Professionnel
- Messages : 463
Date d'inscription : 21/08/2016
Age : 46
Localisation : New Hampshire, USA
Emploi/loisirs : Retired, Model Railroading, Model Cars, Model Trucks, REAL Cars & Trucks, Restoring OLD car & Truck parts unusable, repurposed.
Humeur : Good
Re: 1969 Dodge Coronet R/T
par 528-Hemi Jeu 20 Avr - 1:19
Well now comes the fun! I have to see whats all involved in "fitting" those NICE & wide rear tires to the frame! Needless to say at this point, I think they aren't going to fit within the sheet metal (plastic) of the body, and I want then INSIDE the car, just like the real factory ones would have been! No sticking out, no cut fender wells to open it up, it has to go INSIDE the confines of the body, as well as the inner fenders in the back! With that said, I plan to rack the car just slightly..... Because those wide tires will be good seen from the back, that way! Plus, with that, them inside the fender wells, I think will look good!
I did some test fitting, and with the stock rear differential, and the width of the tires, I'm going to have to narrow the rear axles a bit, as well as "tub" the rear inner fenders too! So this ought to prove fun on the build! (I've yet to tub any car I've built so this will be a first for me!)
So with that all figured out, I set out to begin hacking the frame to get the tires to fit in the back!

Well the factory inner fenders are gone! (However, I did save them if needed for a future build that they are beat up from a Gue bomb I may have bought at some point!) They were cut out in such a way to save them! Above you see, they weren't yet cleaned up from the cuts!
While cutting them out, I had noticed something however, The locations the box-stock suspension went, was in need of some attention, As the suspension was removed by me from the frame, the glue left in-place would create an issue when putting the suspension back in-place, OR better yet, I would have to build upon what's there to get that "rack" on the stance I was looking for! Which is the goal! So with the Dremel, and a small file I began to resurface those 4 areas, and get them as close to factory as possible! So when the time came to build onto it, I'd have good gluing surfaces to work with as at this point, I'm NOT sure where I was going to go with the suspension! I'm building as I go, but having a good idea of what, I'm trying to achieve!
Theres more to come! Stay tuned! Thanks to all those following along!
I did some test fitting, and with the stock rear differential, and the width of the tires, I'm going to have to narrow the rear axles a bit, as well as "tub" the rear inner fenders too! So this ought to prove fun on the build! (I've yet to tub any car I've built so this will be a first for me!)
So with that all figured out, I set out to begin hacking the frame to get the tires to fit in the back!
Well the factory inner fenders are gone! (However, I did save them if needed for a future build that they are beat up from a Gue bomb I may have bought at some point!) They were cut out in such a way to save them! Above you see, they weren't yet cleaned up from the cuts!
While cutting them out, I had noticed something however, The locations the box-stock suspension went, was in need of some attention, As the suspension was removed by me from the frame, the glue left in-place would create an issue when putting the suspension back in-place, OR better yet, I would have to build upon what's there to get that "rack" on the stance I was looking for! Which is the goal! So with the Dremel, and a small file I began to resurface those 4 areas, and get them as close to factory as possible! So when the time came to build onto it, I'd have good gluing surfaces to work with as at this point, I'm NOT sure where I was going to go with the suspension! I'm building as I go, but having a good idea of what, I'm trying to achieve!
Theres more to come! Stay tuned! Thanks to all those following along!
528-Hemi- Professionnel
- Messages : 463
Date d'inscription : 21/08/2016
Age : 46
Localisation : New Hampshire, USA
Emploi/loisirs : Retired, Model Railroading, Model Cars, Model Trucks, REAL Cars & Trucks, Restoring OLD car & Truck parts unusable, repurposed.
Humeur : Good
Re: 1969 Dodge Coronet R/T
par 528-Hemi Jeu 20 Avr - 1:20
So with my last posting, I have a little to take into consideration, I want to rack the car's stance, as well as stuff a set of wide tread tires in the back.... All in the while keeping the tires under the confines of the car! I THINK all of that is possible without having to replace the frame with something else and going more racing, then street stock. SO..... I know know I'll have to tub the rear inner fenders, which means I have a couple choices. I have to either build/manufacture my own tubs, OR use something I can just cut to fit, and make fit into the openings I've already cut! Which is easier, BUT what to use? WELL, I've seen on one forum where a builder used a pill bottle to make "tubs"........ WELL, I have A LOT of pill bottles around due to all the meds I'm on, SO, I went looking to see what all I had!
Having looked through the whole house, I had these prescription bottles, that had a weird coating on them, and glue any of it that I have would not stick to it! SO..... I kept looking! Then I found a couple pill bottles, 2 different sizes, One bottle was from a bottle of a bottle of Ibuprofen, which was kinda big for this but was white plastic, and had no weird coating on it..... Then right beside it, I found another bottle that was a bottle of Baby Aspirin... Smaller bottle, yes, and also white! With that one it was almost PERFECTLY sized for making inner fenner tubs with! SO, with the idea of using it, I went to see what other bottles (empty ones) I had, cleaned out, so there was no other med dust in it to mix with the Baby Aspirin! Well pours those pills into the clean empty bottle, peeled off the label to the Baby Asprin bottle (came off pretty easy too), and then transferred it to the new bottle and off the the shop I went with the empty Baby Asprin bottle! Gotto "sizing" the bottle to the cars frame where I cut off the box-stock ones, and with a little cleaning up of the frame, and some backfill on the rear of the frame where it come to meet the frame and real trunk floor panels, fit pretty good! I had some contour angles to figure out and cut on the bottle but that was OK, I was good with that work, A LOT less work then making my own tubs to say the least!
So with that, the first order of business was to cut the bottle in half, top to bottom.... With the ole razor saw, in-half it went! I then slide the bottle onto the frame with the bottom of the bottle touching the frame then drew the contour of the frame onto the bottom of the bottle only to add a little to the marks to then fit into the contours of the frame! I made the tubs fit so that, the front rolled portion was even in the front of them, and the frame, and where the rear fell well, I'd have to either back fill or cut the frame for them to fit. I was good with either way too! I made the tubs however fit BEHIND the frame rails! As it was thee best choice with the build.... And would then glue on the inside of the car, not the outside where the glue joint could be seen no matter bad, or how good that glue joint could be, it wouldn't be seen when all said and done from the outside of the car when looking at it!


And now you see how I went about the tubs! If you look, you can see where the rear frame rails are on the outside,, glue joint isn't real bad, (Needs cleaned up a bit) but is a good looking mounting of the tubs, all things considered! Then the back edge of the tubs, as you can see, I had to back fill..... A little tape on the bottom of the frame, which you can see, and a little super glue and baking soda goes a long ways! Has a little bit of contouring done in that picture, and needs a little more, but all-in-all looks good sitting there! A small file and maybe even some sand paper to clean everything up a bit and smooth out the glue joiunts a little may be in order but nothing extreme needs done! So with that, I think this way was my best choice, and a real good choice, that I made to go about it!
Then to further inspect the frame as it sits there, I've also played/toyed with the idea to rack the suspension in the back, to raise it up a bit. The stock suspension locations, were to low in order to get that rack I was looking for, NOW let me indulge on the rack and look I was trying to get, without being extreme.... Extreme meaning the rear of the car was so high you'd have to look for the license plate where normally you'd look at the top of the rear window trim! (I did NOT want it that high up) SO, this means, I'd have ot play with the plastic, stacking it, if need be for the mounts, BUT the mounts had to be just so in order to get the frame built to except the suspension mounts. SO with that, I went a way on that that not often is done, or at all.... Because in the way I plan to get the height up, I could modify the frame rails in the front, just enough to allow the rear leaf springs to flex and look right, get the height, and mount flat! SO, I modified the frame rail bottoms to do this and made a mount that would take the suspension leaf spring hangers, and be level side to side, plus, have a slightly wide stance on the mount to connect to the rear body floor panel on each side, not just be connected to the frame itself, just for the stability look of it!

Notice the white "blocks" on the frame rails? Both front, and back? I built up the stability outward, from the frame rails both front and back. Then on top of that I added a "pad" for the suspension to sit/mount/glue too. And removed just a little "meat" from the frame rail itself on the front area of where the front leaf spring shackles would mount. To look the part as tho the leaf spring could actually flex. I did that exact same thing on the rear mounts too.... Frame was put into the mill and cut flat BEFORE the plastic plating was added to insure positive levelness of the suspension, so I didn't have one side higher or lower then the other when the suspension and tires were added and then have to figure out how to flex the suspension to have all the tire sit on the ground, and touch without them looking odd. Then, I added the white block plating, all the same thickness!
Then to see what I mean about the glue joints of the tubs, I'll give you this:

The inside glue joints, then when the car is all built and together, you won't see ANY of that! BUT its solid as a rock! And still allows the frame to flex, without being ungodly stiff....
Stay tuned, MORE to come! Thanks for looking, Comments always welcome!
Having looked through the whole house, I had these prescription bottles, that had a weird coating on them, and glue any of it that I have would not stick to it! SO..... I kept looking! Then I found a couple pill bottles, 2 different sizes, One bottle was from a bottle of a bottle of Ibuprofen, which was kinda big for this but was white plastic, and had no weird coating on it..... Then right beside it, I found another bottle that was a bottle of Baby Aspirin... Smaller bottle, yes, and also white! With that one it was almost PERFECTLY sized for making inner fenner tubs with! SO, with the idea of using it, I went to see what other bottles (empty ones) I had, cleaned out, so there was no other med dust in it to mix with the Baby Aspirin! Well pours those pills into the clean empty bottle, peeled off the label to the Baby Asprin bottle (came off pretty easy too), and then transferred it to the new bottle and off the the shop I went with the empty Baby Asprin bottle! Gotto "sizing" the bottle to the cars frame where I cut off the box-stock ones, and with a little cleaning up of the frame, and some backfill on the rear of the frame where it come to meet the frame and real trunk floor panels, fit pretty good! I had some contour angles to figure out and cut on the bottle but that was OK, I was good with that work, A LOT less work then making my own tubs to say the least!
So with that, the first order of business was to cut the bottle in half, top to bottom.... With the ole razor saw, in-half it went! I then slide the bottle onto the frame with the bottom of the bottle touching the frame then drew the contour of the frame onto the bottom of the bottle only to add a little to the marks to then fit into the contours of the frame! I made the tubs fit so that, the front rolled portion was even in the front of them, and the frame, and where the rear fell well, I'd have to either back fill or cut the frame for them to fit. I was good with either way too! I made the tubs however fit BEHIND the frame rails! As it was thee best choice with the build.... And would then glue on the inside of the car, not the outside where the glue joint could be seen no matter bad, or how good that glue joint could be, it wouldn't be seen when all said and done from the outside of the car when looking at it!
And now you see how I went about the tubs! If you look, you can see where the rear frame rails are on the outside,, glue joint isn't real bad, (Needs cleaned up a bit) but is a good looking mounting of the tubs, all things considered! Then the back edge of the tubs, as you can see, I had to back fill..... A little tape on the bottom of the frame, which you can see, and a little super glue and baking soda goes a long ways! Has a little bit of contouring done in that picture, and needs a little more, but all-in-all looks good sitting there! A small file and maybe even some sand paper to clean everything up a bit and smooth out the glue joiunts a little may be in order but nothing extreme needs done! So with that, I think this way was my best choice, and a real good choice, that I made to go about it!
Then to further inspect the frame as it sits there, I've also played/toyed with the idea to rack the suspension in the back, to raise it up a bit. The stock suspension locations, were to low in order to get that rack I was looking for, NOW let me indulge on the rack and look I was trying to get, without being extreme.... Extreme meaning the rear of the car was so high you'd have to look for the license plate where normally you'd look at the top of the rear window trim! (I did NOT want it that high up) SO, this means, I'd have ot play with the plastic, stacking it, if need be for the mounts, BUT the mounts had to be just so in order to get the frame built to except the suspension mounts. SO with that, I went a way on that that not often is done, or at all.... Because in the way I plan to get the height up, I could modify the frame rails in the front, just enough to allow the rear leaf springs to flex and look right, get the height, and mount flat! SO, I modified the frame rail bottoms to do this and made a mount that would take the suspension leaf spring hangers, and be level side to side, plus, have a slightly wide stance on the mount to connect to the rear body floor panel on each side, not just be connected to the frame itself, just for the stability look of it!
Notice the white "blocks" on the frame rails? Both front, and back? I built up the stability outward, from the frame rails both front and back. Then on top of that I added a "pad" for the suspension to sit/mount/glue too. And removed just a little "meat" from the frame rail itself on the front area of where the front leaf spring shackles would mount. To look the part as tho the leaf spring could actually flex. I did that exact same thing on the rear mounts too.... Frame was put into the mill and cut flat BEFORE the plastic plating was added to insure positive levelness of the suspension, so I didn't have one side higher or lower then the other when the suspension and tires were added and then have to figure out how to flex the suspension to have all the tire sit on the ground, and touch without them looking odd. Then, I added the white block plating, all the same thickness!
Then to see what I mean about the glue joints of the tubs, I'll give you this:
The inside glue joints, then when the car is all built and together, you won't see ANY of that! BUT its solid as a rock! And still allows the frame to flex, without being ungodly stiff....
Stay tuned, MORE to come! Thanks for looking, Comments always welcome!
528-Hemi- Professionnel
- Messages : 463
Date d'inscription : 21/08/2016
Age : 46
Localisation : New Hampshire, USA
Emploi/loisirs : Retired, Model Railroading, Model Cars, Model Trucks, REAL Cars & Trucks, Restoring OLD car & Truck parts unusable, repurposed.
Humeur : Good
Re: 1969 Dodge Coronet R/T
par 528-Hemi Jeu 20 Avr - 1:20
Onward we go.... I got the rear of the frame looking pretty good, so I went to the front and seen what I was needing to do to LOWER it just a scoosh. As that racked look would require the front lowered just a little bit! -Not much, but a little would be NICE!
So, I removed the front suspension, and got to looking at what it needed for clean up, and it didn't need a lot, BUT, what did happen on removing the front suspension, was that, the tires to the kit were still on it! And upon removing them, I snapped off one of the axle lugs that go into the wheel back to mount the tire in-place. No worries, I plan to change a bit here anyway, and with that, I'll make a new lug to mount to the suspension. So, I got the frame all cleaned up and ready to take whatever happens to the suspension and K-member. And with that, I had to choose at this point what "look" I was seeking for the frame to be, did I want to go Chrysler style finish, OR Rotisserie-style restore? WELL in my days of working on cars, being a painter of them, when we done one, it was old-school Rotisserie restore! (ONE of the reasons you see a lot of the frames on my models painted flat black), as we coated the frame BEFORE the body was done and a lot of care was taken in order to keep that coating OFF the actual body of the car.... Plus, the coating was near bulletproof! Once dry, you could NOT scuff or scratch the stuff, literally! The car was suspended in the bay of the garage on its side, but not touching anything (We at the garage), had 2 small overhead cranes that were fully electric which a couple sets of chains would suspend the whole car to do such!
So with that in mind, I went to go on the looks of the frame Rotisserie-style restore/build. WITH a little bit of a twist from what I would normally do! As you'll see....

I got the frame ALL cleaned up, and went right to giving it that flat black simulated coating like I did when I worked at the garage! -You can also see the work I did to the Engine Mounts on the frame! That was required to get the Hemi to sit right in the car!
As you can see tho, that frame and all the mounting areas cleaned up rather nicely! I like how this has come along so far! So then now that "twist" on the finish that I was working on creating! Being a "restored" kinda car, which is what I'm seeking, ALSO a built car all at the same time, I took it to another level. I made the frame of the model look as tho the front and rear frame sections were either A. Restored, or B. Replaced with new parts. (You choose that one!) BUT, here is how I went about getting that look:

I took Semi-Gloss clear, and added it to just the frame rails! All done with a brush, and looks pretty good!!! Makes or gives it that "look" as tho it was replaced, or restored to factory spec..... Like I said, You choose what you think it looks like! (EITHER choice, it looks GREAT!)

The WHOLE FRAME!!!! The tubs, the rear frame rails, the whole balla wax, I love how that came out! NICE & CLEAN.... And it has that look and that feel as tho the frame rails were removed, restored, to factory spec, or replaced with new aftermarket parts! -Which is exactly 110% what I was trying to achieve on this part of the build!

Man, considering what I did, what I had to do, and what it has become, that whole thing looks GREAT! Naturally all thats following know, theres a LOT more to come for details but the base to add that detail looks down-right perfect! I'm VERY pleased with the frame work results!


Close ups of the tubs and the rear frame rails.....
I will be doing something more to the fuel tank, at this point in the build, I'm unsure whats to come to that, BUT it needs something more to rid that of its "common" frame finish as it blends in WAY TO MUCH.... BUT I think I have an idea on how thats going to go, and what its going to look like! Stay tuned, more to follow!
Thanks for looking once again, Comments are always welcome!
So, I removed the front suspension, and got to looking at what it needed for clean up, and it didn't need a lot, BUT, what did happen on removing the front suspension, was that, the tires to the kit were still on it! And upon removing them, I snapped off one of the axle lugs that go into the wheel back to mount the tire in-place. No worries, I plan to change a bit here anyway, and with that, I'll make a new lug to mount to the suspension. So, I got the frame all cleaned up and ready to take whatever happens to the suspension and K-member. And with that, I had to choose at this point what "look" I was seeking for the frame to be, did I want to go Chrysler style finish, OR Rotisserie-style restore? WELL in my days of working on cars, being a painter of them, when we done one, it was old-school Rotisserie restore! (ONE of the reasons you see a lot of the frames on my models painted flat black), as we coated the frame BEFORE the body was done and a lot of care was taken in order to keep that coating OFF the actual body of the car.... Plus, the coating was near bulletproof! Once dry, you could NOT scuff or scratch the stuff, literally! The car was suspended in the bay of the garage on its side, but not touching anything (We at the garage), had 2 small overhead cranes that were fully electric which a couple sets of chains would suspend the whole car to do such!
So with that in mind, I went to go on the looks of the frame Rotisserie-style restore/build. WITH a little bit of a twist from what I would normally do! As you'll see....
I got the frame ALL cleaned up, and went right to giving it that flat black simulated coating like I did when I worked at the garage! -You can also see the work I did to the Engine Mounts on the frame! That was required to get the Hemi to sit right in the car!
As you can see tho, that frame and all the mounting areas cleaned up rather nicely! I like how this has come along so far! So then now that "twist" on the finish that I was working on creating! Being a "restored" kinda car, which is what I'm seeking, ALSO a built car all at the same time, I took it to another level. I made the frame of the model look as tho the front and rear frame sections were either A. Restored, or B. Replaced with new parts. (You choose that one!) BUT, here is how I went about getting that look:
I took Semi-Gloss clear, and added it to just the frame rails! All done with a brush, and looks pretty good!!! Makes or gives it that "look" as tho it was replaced, or restored to factory spec..... Like I said, You choose what you think it looks like! (EITHER choice, it looks GREAT!)
The WHOLE FRAME!!!! The tubs, the rear frame rails, the whole balla wax, I love how that came out! NICE & CLEAN.... And it has that look and that feel as tho the frame rails were removed, restored, to factory spec, or replaced with new aftermarket parts! -Which is exactly 110% what I was trying to achieve on this part of the build!
Man, considering what I did, what I had to do, and what it has become, that whole thing looks GREAT! Naturally all thats following know, theres a LOT more to come for details but the base to add that detail looks down-right perfect! I'm VERY pleased with the frame work results!
Close ups of the tubs and the rear frame rails.....
I will be doing something more to the fuel tank, at this point in the build, I'm unsure whats to come to that, BUT it needs something more to rid that of its "common" frame finish as it blends in WAY TO MUCH.... BUT I think I have an idea on how thats going to go, and what its going to look like! Stay tuned, more to follow!
Thanks for looking once again, Comments are always welcome!
528-Hemi- Professionnel
- Messages : 463
Date d'inscription : 21/08/2016
Age : 46
Localisation : New Hampshire, USA
Emploi/loisirs : Retired, Model Railroading, Model Cars, Model Trucks, REAL Cars & Trucks, Restoring OLD car & Truck parts unusable, repurposed.
Humeur : Good
Re: 1969 Dodge Coronet R/T
par 528-Hemi Jeu 20 Avr - 1:20
So in the end of my last posting, I spoke a little on that fuel tank blending in a little too much, and it needed something, different then its surroundings to look as tho it was either restored old part, or replaced with something other then, or simply OEM part replacement aftermarket.... With that I thought about it for a bit before carrying out anything to it. I THINK I was looking at the frame and seen it needed to have the fuel tank made to look like a OEM stock replacement by an aftermarket company.... Having said that, it will have some other details added to it, to look as tho its stock, but have aftermarket feel to the details to it!

A bare metal fuel tank, that looks to have some sort of exterior treatment on it.... That is a good change from my other builds (gloss black fuel tanks, that were stock), but reconditioned and a hefty coating of Black Epoxy coating on it! -I did this myself at he garage on EVERY car we restored! That is, if the fuel tanks were in good shape, IF they needed replaced, we got a fuel tank that looked VERY similar to what you see on my model here, BUT it before it got put into the car, was also coated, with the same black Epoxy coating, that gave it a really glossy finish.... This time around, on the model I'm simply adding the fuel tank as tho it was new from a aftermarket company that got them, with a coating over bare steel... -Just to do, something different!


I MAY add some sort of clear over that steel color paint. I'm not sure yet, as I have to figure out what I plan to do for the tank straps! As they need to be a little bit highlighted too, I THINK I am going to go OEM aftermarket replacement look on them too! Just unsure right now how I plan to go about it!
The frame is near done as far as it being a "base"to build upon.... Just because it WILL be getting detailed just like all my other models do!!!
I will be working out the rear differential work needed next, as it needs narrowed to work on this car! Stay tuned, thats coming up next! Thanks for looking, ~ENJOY
A bare metal fuel tank, that looks to have some sort of exterior treatment on it.... That is a good change from my other builds (gloss black fuel tanks, that were stock), but reconditioned and a hefty coating of Black Epoxy coating on it! -I did this myself at he garage on EVERY car we restored! That is, if the fuel tanks were in good shape, IF they needed replaced, we got a fuel tank that looked VERY similar to what you see on my model here, BUT it before it got put into the car, was also coated, with the same black Epoxy coating, that gave it a really glossy finish.... This time around, on the model I'm simply adding the fuel tank as tho it was new from a aftermarket company that got them, with a coating over bare steel... -Just to do, something different!
I MAY add some sort of clear over that steel color paint. I'm not sure yet, as I have to figure out what I plan to do for the tank straps! As they need to be a little bit highlighted too, I THINK I am going to go OEM aftermarket replacement look on them too! Just unsure right now how I plan to go about it!
The frame is near done as far as it being a "base"to build upon.... Just because it WILL be getting detailed just like all my other models do!!!
I will be working out the rear differential work needed next, as it needs narrowed to work on this car! Stay tuned, thats coming up next! Thanks for looking, ~ENJOY
528-Hemi- Professionnel
- Messages : 463
Date d'inscription : 21/08/2016
Age : 46
Localisation : New Hampshire, USA
Emploi/loisirs : Retired, Model Railroading, Model Cars, Model Trucks, REAL Cars & Trucks, Restoring OLD car & Truck parts unusable, repurposed.
Humeur : Good
Re: 1969 Dodge Coronet R/T
par 528-Hemi Jeu 20 Avr - 1:21
So the box-stock rear differential, and suspension was just a bit to wide now that I choose the tires I wanted for the build so this will require me to "narrow" it. The one part, tho that needs to remain "factory" is the leaf springs, as I made the mounts for them on the frame to reflect the same as the box-stock mounts, just moved inward! So I got right to that, and made it for fit the frame as well as the new rear tires and rims! So heres how that all turned out:

This shot shows that there was A LOT of "meat" in those 2 circled areas, and needed cleaned up. As I removed the exhaust pipe mounts from the rear (I'm NOT a fan of that set up!) so....


As you can see, there was A LOT to be done to the rear before any "narrowing" happened, and to give you all a idea I took 2 of the rears, (to the same model, that I have 2 of) and put them side-by-side.....


As you all following along can see, I have 2 of these kits.... The rears to both kits are seen here (The other kit was gotten as a glue bomb too!) BUT in good shape, for the most part. Anyway, as the picture shows, the factory box-stock rear differential & suspension, is on the right, and the one I modified is on the left... -Quite a bit of narrowing had to be done, but done very carefully as the leaf springs had to mount in the locations on the frame!


With a little painting and done to go with the "look" of the frame I made it all come together. The rear looks really good as you see it here, (I'm not a fan of that hollow hole on top, but once on the model that won't be seen anyway!) BUT, had this been on a lifted truck, I'da filled that all in, and contoured it to go with the rest of the rear differential that can be seen as in a lifted truck it be seen a bit and wouldn't look all that good but in this case, because its in a car, I doubt it will be seen so. I left well enough alone!

I went as far as to paint the rear differential "pumpkin" ring-gear cover "steel", and left it. -I think it looks good and will look good under the car when I get that far!
So while working on all this, I got to thinking of what I was gonna show for brakes in the back as well as the fronts.... Because the tires and rims were all together I went right into making parts, and thinking how all was going to go together. The rears will have Drum brakes. like factory.... The fronts however, I'm going to go disk brakes.... I went to see what I had for materials to turn in the lathe to make those with as they (as we all know) didn't have anything in he kit and I've modified the suspension and wheel backs to fit such when I was putting the front tires together for the model. This is what that looks like before they get paint:

Custom turned on my Unimat Lathe, and ready for paint! I think with the disks painted and the caliper done in red, will look GREAT!!!!
Thats it for now till more progress is made....... Thanks for following along, Comments are always welcome & enjoyed! ~ENJOY!
This shot shows that there was A LOT of "meat" in those 2 circled areas, and needed cleaned up. As I removed the exhaust pipe mounts from the rear (I'm NOT a fan of that set up!) so....
As you can see, there was A LOT to be done to the rear before any "narrowing" happened, and to give you all a idea I took 2 of the rears, (to the same model, that I have 2 of) and put them side-by-side.....
As you all following along can see, I have 2 of these kits.... The rears to both kits are seen here (The other kit was gotten as a glue bomb too!) BUT in good shape, for the most part. Anyway, as the picture shows, the factory box-stock rear differential & suspension, is on the right, and the one I modified is on the left... -Quite a bit of narrowing had to be done, but done very carefully as the leaf springs had to mount in the locations on the frame!
With a little painting and done to go with the "look" of the frame I made it all come together. The rear looks really good as you see it here, (I'm not a fan of that hollow hole on top, but once on the model that won't be seen anyway!) BUT, had this been on a lifted truck, I'da filled that all in, and contoured it to go with the rest of the rear differential that can be seen as in a lifted truck it be seen a bit and wouldn't look all that good but in this case, because its in a car, I doubt it will be seen so. I left well enough alone!
I went as far as to paint the rear differential "pumpkin" ring-gear cover "steel", and left it. -I think it looks good and will look good under the car when I get that far!
So while working on all this, I got to thinking of what I was gonna show for brakes in the back as well as the fronts.... Because the tires and rims were all together I went right into making parts, and thinking how all was going to go together. The rears will have Drum brakes. like factory.... The fronts however, I'm going to go disk brakes.... I went to see what I had for materials to turn in the lathe to make those with as they (as we all know) didn't have anything in he kit and I've modified the suspension and wheel backs to fit such when I was putting the front tires together for the model. This is what that looks like before they get paint:
Custom turned on my Unimat Lathe, and ready for paint! I think with the disks painted and the caliper done in red, will look GREAT!!!!
Thats it for now till more progress is made....... Thanks for following along, Comments are always welcome & enjoyed! ~ENJOY!
528-Hemi- Professionnel
- Messages : 463
Date d'inscription : 21/08/2016
Age : 46
Localisation : New Hampshire, USA
Emploi/loisirs : Retired, Model Railroading, Model Cars, Model Trucks, REAL Cars & Trucks, Restoring OLD car & Truck parts unusable, repurposed.
Humeur : Good

viper006- Modérateur
- Messages : 1222
Date d'inscription : 26/06/2016
Age : 48
Re: 1969 Dodge Coronet R/T
par 528-Hemi Jeu 20 Avr - 18:29
-Yeah it is a lot of work, but I think it'll be worth it just to save the kit as its in pretty good shape! Thanks for looking & following along!
528-Hemi- Professionnel
- Messages : 463
Date d'inscription : 21/08/2016
Age : 46
Localisation : New Hampshire, USA
Emploi/loisirs : Retired, Model Railroading, Model Cars, Model Trucks, REAL Cars & Trucks, Restoring OLD car & Truck parts unusable, repurposed.
Humeur : Good
Re: 1969 Dodge Coronet R/T
par Gigi Jeu 20 Avr - 19:22
viper006 a écrit:sacré boulot .....bonne continuation


Gigi- Professionnel
- Messages : 406
Date d'inscription : 18/01/2016
Age : 54
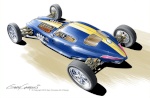
Le 2tsch- Expert

- Messages : 1779
Date d'inscription : 17/01/2016
Age : 51
Localisation : dans le Jura en Honda!!
Emploi/loisirs : routier
Humeur : tu sais ce qui te dit le cassis!!
Re: 1969 Dodge Coronet R/T
par 528-Hemi Jeu 20 Avr - 23:45
Thanks guys!!!! Much appreciated! I'll be getting back to this one about half ways through the weekend, I'm headed out to a Show on Saturday so..... -Stay tuned! MORE of it will come!
528-Hemi- Professionnel
- Messages : 463
Date d'inscription : 21/08/2016
Age : 46
Localisation : New Hampshire, USA
Emploi/loisirs : Retired, Model Railroading, Model Cars, Model Trucks, REAL Cars & Trucks, Restoring OLD car & Truck parts unusable, repurposed.
Humeur : Good

Loic- Spécialiste

- Messages : 696
Date d'inscription : 19/01/2016
Age : 51
528-Hemi- Professionnel
- Messages : 463
Date d'inscription : 21/08/2016
Age : 46
Localisation : New Hampshire, USA
Emploi/loisirs : Retired, Model Railroading, Model Cars, Model Trucks, REAL Cars & Trucks, Restoring OLD car & Truck parts unusable, repurposed.
Humeur : Good
Re: 1969 Dodge Coronet R/T
par Fred74 Ven 21 Avr - 17:48
as always, my friend, a master class awesome job 

Fred74- Admin

- Messages : 2941
Date d'inscription : 07/01/2016
Age : 52
Localisation : Metz-Tessy
Emploi/loisirs : Géomètre Topographe
Humeur : Impatient -

Re: 1969 Dodge Coronet R/T
par 528-Hemi Dim 23 Avr - 23:23
Fred74 a écrit:as always, my friend, a master class awesome job
Thanks Fred! Much appreciated!!!! -I've been working on this one, and another one just like it (thats gonna be a Super Bee) also with a Hemi for awhile now..... This one is pushing almost a year I think, (I got this one last year on July 4th) and started picking parts for it and pulling it apart not to long after that.....
Come a ways it did, and still got a good ways to go! BUT when I get bored with one build, theres always another to pick and carry on a bit further from when it was last sat down.....
528-Hemi- Professionnel
- Messages : 463
Date d'inscription : 21/08/2016
Age : 46
Localisation : New Hampshire, USA
Emploi/loisirs : Retired, Model Railroading, Model Cars, Model Trucks, REAL Cars & Trucks, Restoring OLD car & Truck parts unusable, repurposed.
Humeur : Good
» 1/25 dodge daytona 1969 pro-modeler
» 1969 chevrolet nova
» Dodge Viper
» Dodge Charger '71. Amt/Ertl 1/25.
» Dodge RAM VTS
» 1969 chevrolet nova
» Dodge Viper
» Dodge Charger '71. Amt/Ertl 1/25.
» Dodge RAM VTS
Page 1 sur 1
Permission de ce forum:
Vous ne pouvez pas répondre aux sujets dans ce forum